Valentine’s Day Meringue Kisses
I love the light crunch of Valentine’s Day Meringue Kisses, especially with a little pink swirl and a cup of coffee. These small cookies use egg whites, sugar, cream of tartar, and vanilla to make a delicate treat that looks lovely on a dessert plate.
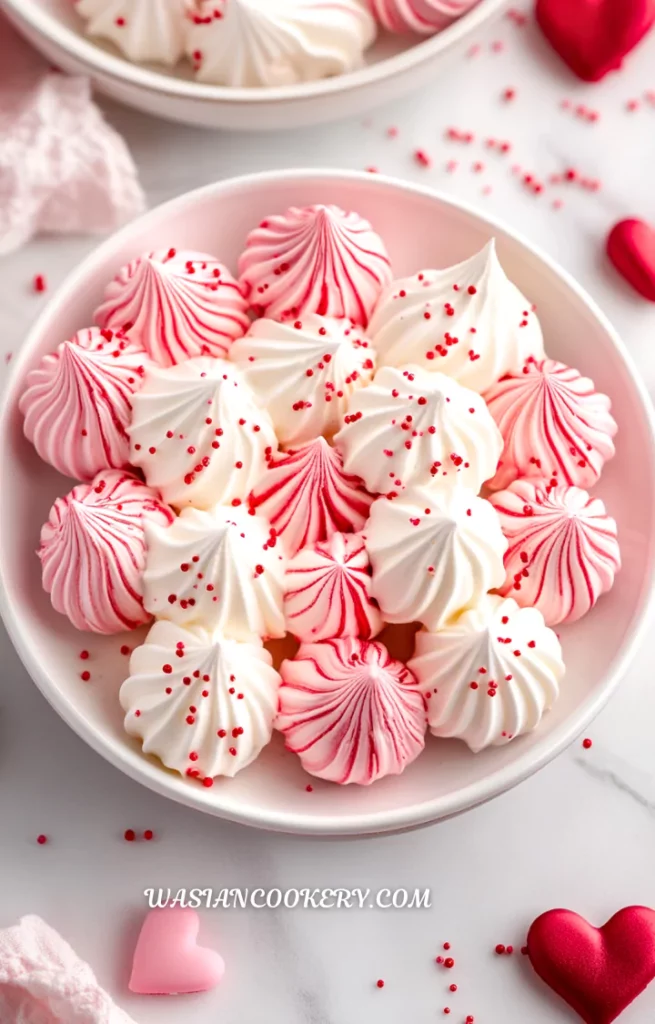
The ingredients are simple, but meringue rewards a gentle pace. Clean equipment, slowly added sugar, and low oven heat help the kisses hold their shape. Their pointed tops can be piped with a star or round tip, and a few sprinkles give them a festive finish.
Plan ahead for the drying time. This recipe makes about 40 kisses and needs at least 4 hours 50 minutes, including 20 minutes of preparation, 90 minutes of baking, and at least 3 hours in the switched-off oven. Most of that time is hands-off, but the kisses must be completely cool and crisp before packing.
Why This Dish Is Great
- The short ingredient list makes it easy to check that everything is ready before you begin whipping.
- Small kisses bring sweetness and crunch to a dessert tray without needing frosting or a rich filling.
- Pink and red gel colors suit Valentine’s Day, while plain white meringues work for almost any celebration.
- Once fully dry, the cookies can be packed ahead, leaving the day of serving free for other cooking.
- Their shape makes them useful as cake decorations, little gifts, or a simple accompaniment to tea.
- A piping bag creates pretty ridges, but the mixture can also be spooned into similarly sized small mounds.
What Are the Best Egg Whites?
Use the whites from four large eggs, keeping the measured sugar and cream of tartar unchanged. Separate cold eggs one at a time into a small bowl, then transfer each clean white to the mixing bowl. This keeps a broken yolk from spoiling the whole batch. Let the whites lose their refrigerator chill while you prepare the trays; do not leave them sitting out for hours.
A metal or glass bowl is helpful because it is easier to clean thoroughly. A film of butter or oil can interfere with the foam. Carton egg whites vary: use them only if their label says they are suitable for whipping into meringue and gives an equivalent for four large whites. Do not assume every liquid egg product behaves the same way.
Ingredients
- 4 large egg whites, room temperature
- 1 cup granulated sugar
- 1/4 teaspoon cream of tartar
- 1/2 teaspoon vanilla extract
- Pink or red gel food coloring
- Sprinkles (optional, for decoration)
Kitchen Equipment You Will Need
As an Amazon Associate I earn from qualifying purchases.
- Glass or metal mixing bowl
- Small mixing bowl
- Electric mixer
- Measuring cups
- Measuring spoons
- Silicone spatula
- Piping bag
- Piping tips
- Baking sheets
- Parchment paper
- Oven thermometer
- Microwave-safe bowl
- Small spoon
- Airtight containers
- Serving platter
How To Make Valentine’s Day Meringue Kisses
Step 1
Preheat the oven to 200°F (93°C). Line two baking sheets with parchment paper and position the racks so air can circulate around both trays. Wash and thoroughly dry a glass or metal mixing bowl, the beaters, and a small bowl for separating eggs. Keep yolk and grease out of the whites.
Step 2
Separate each egg into the small bowl before adding its white to the mixing bowl. Keep the yolks refrigerated for another use. Beat the four room-temperature whites on medium speed until foamy, then add the cream of tartar. Continue beating until soft peaks begin to form.
Step 3
Add the sugar gradually, about one tablespoon at a time, beating between additions. Continue until the meringue is thick and glossy and its peaks stand upright when the beaters are lifted. A little rubbed between clean fingers should feel mostly smooth. Wash your hands afterward, and do not taste the uncooked meringue. Stop once the peaks hold; do not beat until the mixture becomes dry or clumpy.
Step 4
Fold in the vanilla gently with a silicone spatula. Add a small amount of pink or red gel coloring, either folding just a few times for streaks or mixing gently until the color is even. Avoid liquid coloring, which adds unnecessary moisture.
Step 5
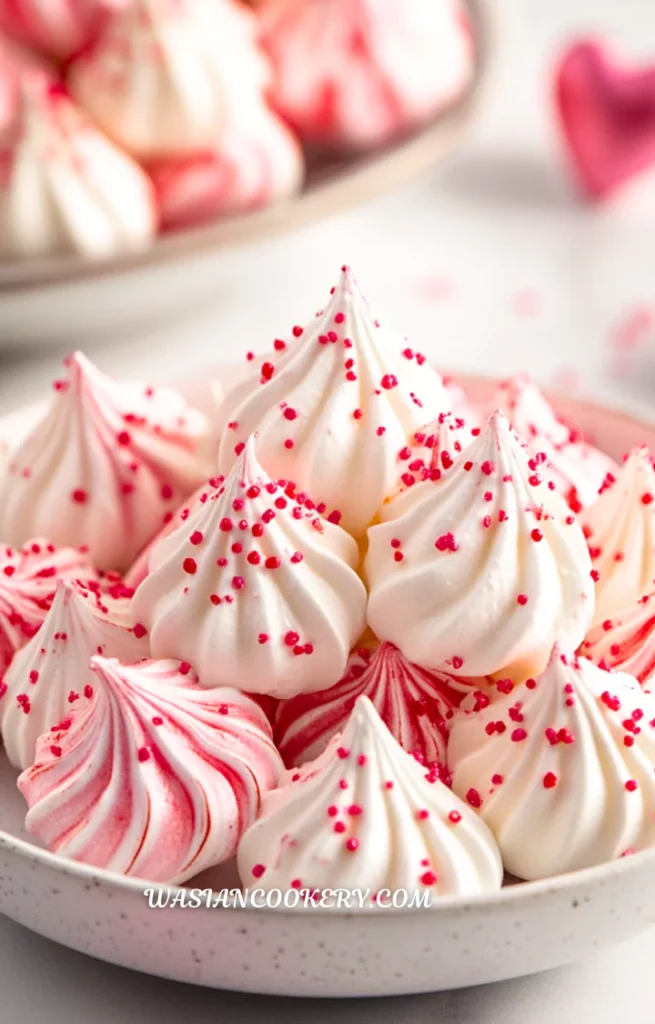
Fit a piping bag with a star or round tip and fill it with meringue. Hold the tip upright close to the parchment, squeeze a small mound about 1 inch wide, stop squeezing, then lift to form a point. Leave about 1 inch between kisses and keep their size consistent.
Step 6
Add a few small sprinkles if desired. Place both trays in the oven promptly. If your oven cannot accommodate both trays with space for air circulation, make and bake smaller batches; the listed total assumes both trays bake together.
Step 7
Bake for about 90 minutes, until the kisses feel dry and lift easily from the parchment. If they are still tacky or cling to the paper, continue at 200°F in 15-minute intervals. Turn the oven off, keep the door closed, and leave the trays inside for at least 3 hours, until completely cool. Break open a cooled kiss: the center should be dry and crisp, not wet or gummy. If needed, return the trays to 200°F for more drying, then cool again in the switched-off oven.
Step 8
Once completely cool and dry, transfer the kisses gently to an airtight container. Separate layers with parchment and close the lid promptly. The recipe makes about 40 kisses, depending on piping size. Allow at least 4 hours 50 minutes overall: 20 minutes preparation, 90 minutes baking, and at least 3 hours cooling and drying. Extra drying or separate batches take longer.
Notes
- Prepare the trays and piping bag before whipping. Finished meringue is easiest to shape while it is still airy and holding its peaks.
- Add sugar steadily rather than tipping in the whole cup. Give each addition a moment to mix into the foam before adding the next.
- Use the look of the peaks as your guide. Mixer strength and egg temperature affect whipping time, so a fixed number of minutes can be misleading.
- Keep the oven low. An oven thermometer can reveal a hot oven if the kisses become beige or brown well before their centers are dry.
- Uniform width matters more than perfect points. A tray of mixed large and small mounds will not dry at the same pace.
- Humidity may lengthen baking and make finished meringues sticky. Choose a dry day when possible and keep the container closed between servings.
- Reserve the oven for the entire cooling period. Opening it repeatedly or removing the trays early can interrupt drying and increase cracking.
Ingredients You Can Add
Keep additions light so the meringue can still dry properly. These are optional finishes or flavor ideas; they do not replace any ingredient in the base recipe.
- A little melted dark chocolate can be drizzled over completely cooled kisses. Melt it in a microwave-safe bowl in short bursts, stirring between bursts, then use a small spoon.
- Melted white chocolate gives a pale decorative drizzle. Let it set fully before stacking the cookies.
- A light scattering of crushed freeze-dried raspberries adds a tart finish just before serving.
- A pinch of cinnamon can be folded in with the vanilla for a warmer flavor.
- A few drops of rose water can add a floral note; avoid adding a large splash of liquid.
- A tiny amount of food-grade edible glitter can add sparkle. Choose a product explicitly labeled edible, rather than merely nontoxic.
What To Serve With Meringue Kisses
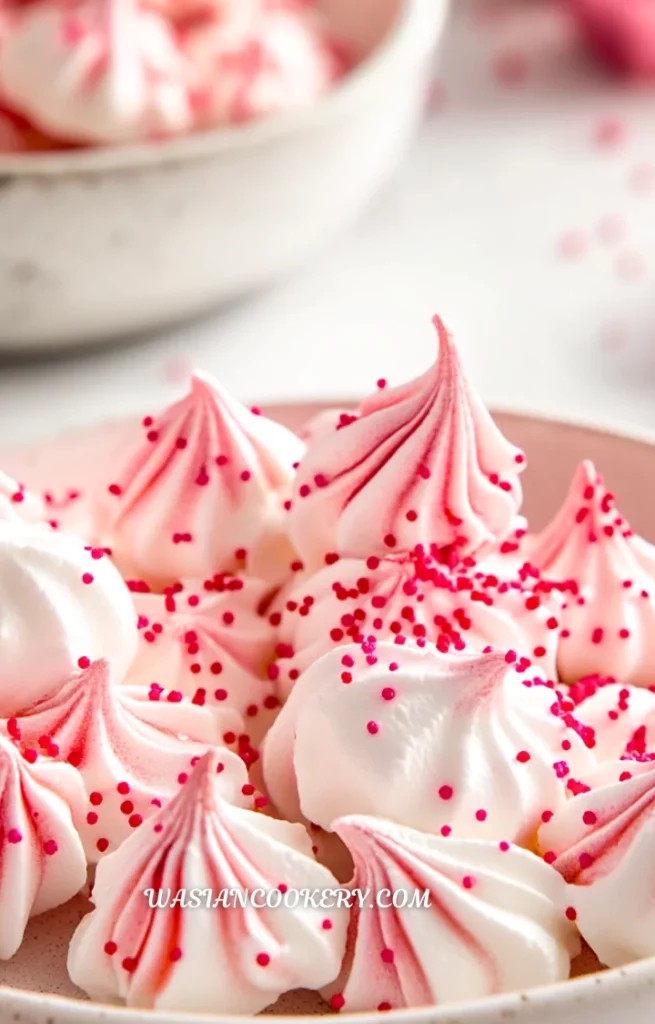
Arrange the kisses in a heart shape on a serving platter, or place a few beside each coffee cup. For a dessert table with a creamy fruit option, add chocolate strawberry tarts. Keep the crisp meringues on their own dry plate.
If you enjoy chocolate and strawberries together, Dubai chocolate strawberry cups offer another idea for a separate dessert. Add meringues to moist desserts only just before eating; cream and fruit quickly soften their delicate shells.
For a warm drink with the cookie tray, try champurrado. Its thicker chocolate flavor pairs well with a small, airy sweet. Plain tea or coffee also works, and lets the vanilla in the kisses stay noticeable.
Variations and Swaps
- Leave out the coloring for classic white kisses. Their ridges still look pretty with a small scattering of sprinkles.
- Fold pink gel color only partway through the mixture for pale swirls rather than an even shade.
- Divide the finished meringue between two clean bowls and color each portion differently before piping.
- Use a round tip for smooth kisses or a star tip for deeper ridges. Keep the mounds about the same width.
- Spoon small mounds onto parchment if you do not have a piping bag. Match their size and check dryness in the same way.
- Use a little peppermint extract in place of some vanilla for a cool flavor, keeping the total extract modest.
- Use almond extract in place of some vanilla for a stronger fragrance. Label the flavor clearly when sharing with others.
- Make tiny finishing pieces for cupcakes, checking earlier because smaller meringues can dry faster. Add them shortly before serving, and expect the yield to change.
Storage
Store plain, completely dry kisses in an airtight container at room temperature in a cool, dry place for up to two weeks. Use parchment between layers and avoid crushing the pointed tops. Do not seal them while warm: trapped moisture softens the cookies. If the room is humid, their best texture may last for less time.
For longer storage, freeze plain kisses in a rigid airtight container with parchment between layers. Keep them protected from heavier food and allow the closed container to come to room temperature before opening, limiting condensation on the cookies. Chocolate finishes and other toppings can change how they look after freezing, so plain kisses are the simplest make-ahead choice. Discard any that become visibly spoiled rather than trying to dry them again.
FAQ
Why will my egg whites not hold peaks?
Check for yolk, grease, or unsuitable carton whites. A clean bowl and beaters are essential. If the whites are only softly peaked, they may need more whipping; if they are contaminated with fat, more beating may not fix the problem.
Why are the kisses sticky in the middle?
They need more drying, especially if they were piped larger or baked on a humid day. The outside can feel firm while the middle is still gummy. Check a cooled sample and extend the low-heat drying and closed-oven cooling as needed.
Can I reduce the sugar?
Keep the full cup for this recipe. Sugar contributes to the structure as well as sweetness, so reducing it changes the way the foam holds and dries. Serve smaller kisses if you want a smaller sweet portion.
Why did the tops crack?
High heat and sudden temperature changes can contribute to cracks. Keep the oven at the low setting and let the trays cool slowly inside. A small cosmetic crack does not spoil a kiss that is otherwise fully dry and crisp.
Can I use liquid food coloring?
Gel coloring is easier here because it gives color with very little added liquid. Start with a small amount and fold gently. For a simple alternative, leave the kisses white and rely on a few sprinkles for color.
Can I box them as gifts?
Yes, once they are fully cool, dry, and crisp. Use a container that closes well, cushion the layers with parchment, and keep it away from steam or damp air. Include an egg ingredient note and any relevant topping or flavor information.
Short Description
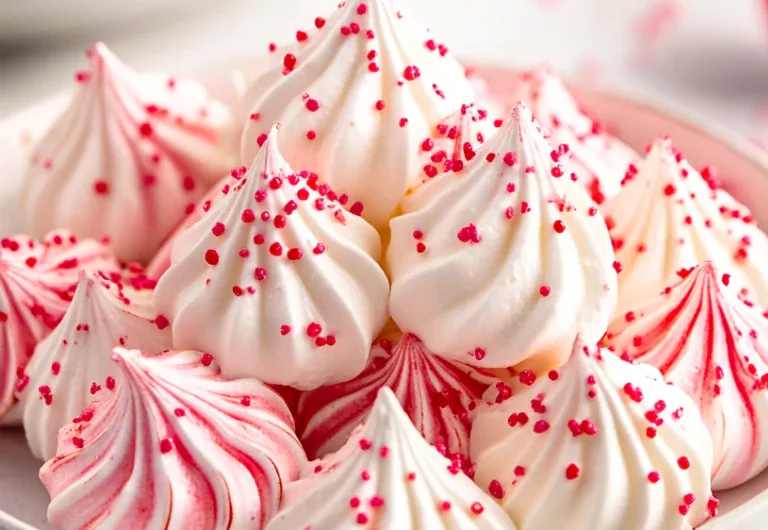
Light vanilla meringue kisses with pink or red swirls, baked gently and dried in the cooling oven until crisp throughout.
Valentine’s Day Meringue Kisses
Course: DessertCuisine: FrenchDifficulty: Easy40
kisses20
minutes1
hour30
minutes4
hours50
minutesLight vanilla meringue kisses with pink or red swirls, baked gently and dried in the cooling oven until crisp throughout.
Ingredients
4 large egg whites, room temperature
1 cup granulated sugar
1/4 teaspoon cream of tartar
1/2 teaspoon vanilla extract
Pink or red gel food coloring
Sprinkles (optional, for decoration)
Directions
- Preheat the oven to 200°F (93°C). Line two baking sheets with parchment paper and position the racks so air can circulate around both trays. Wash and thoroughly dry a glass or metal mixing bowl, the beaters, and a small bowl for separating eggs. Keep yolk and grease out of the whites.
- Separate each egg into the small bowl before adding its white to the mixing bowl. Keep the yolks refrigerated for another use. Beat the four room-temperature whites on medium speed until foamy, then add the cream of tartar. Continue beating until soft peaks begin to form.
- Add the sugar gradually, about one tablespoon at a time, beating between additions. Continue until the meringue is thick and glossy and its peaks stand upright when the beaters are lifted. A little rubbed between clean fingers should feel mostly smooth. Wash your hands afterward, and do not taste the uncooked meringue. Stop once the peaks hold; do not beat until the mixture becomes dry or clumpy.
- Fold in the vanilla gently with a silicone spatula. Add a small amount of pink or red gel coloring, either folding just a few times for streaks or mixing gently until the color is even. Avoid liquid coloring, which adds unnecessary moisture.
- Fit a piping bag with a star or round tip and fill it with meringue. Hold the tip upright close to the parchment, squeeze a small mound about 1 inch wide, stop squeezing, then lift to form a point. Leave about 1 inch between kisses and keep their size consistent.
- Add a few small sprinkles if desired. Place both trays in the oven promptly. If your oven cannot accommodate both trays with space for air circulation, make and bake smaller batches; the listed total assumes both trays bake together.
- Bake for about 90 minutes, until the kisses feel dry and lift easily from the parchment. If they are still tacky or cling to the paper, continue at 200°F in 15-minute intervals. Turn the oven off, keep the door closed, and leave the trays inside for at least 3 hours, until completely cool. Break open a cooled kiss: the center should be dry and crisp, not wet or gummy. If needed, return the trays to 200°F for more drying, then cool again in the switched-off oven.
- Once completely cool and dry, transfer the kisses gently to an airtight container. Separate layers with parchment and close the lid promptly. The recipe makes about 40 kisses, depending on piping size. Allow at least 4 hours 50 minutes overall: 20 minutes preparation, 90 minutes baking, and at least 3 hours cooling and drying. Extra drying or separate batches take longer.
Notes
- Total time includes at least 3 hours of closed-oven cooling and drying after the 90-minute bake. Humidity, larger kisses, or separate batches require longer; check a cooled center for a dry, crisp texture.
- Use clean, grease-free equipment. Keep the original four large whites and one cup sugar; add sugar gradually and stop at glossy stiff peaks. Store only when fully cool and dry.